Overview
In this article, we will review managing resident notes.
Video Tutorial
Creating and Viewing Resident Notes
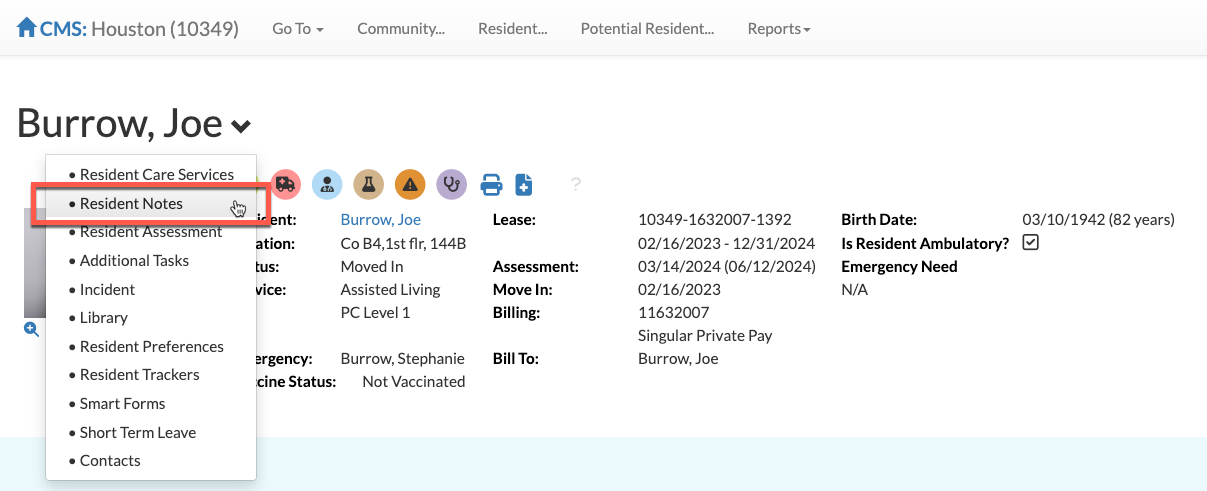
Step 1: Choose a resident from the “Resident…” dropdown located on the menu bar at the top of the Aline Care homepage. This will redirect you to the resident’s profile page.

Step 2: From the resident's profile page, select the dropdown arrow next to the resident’s name and select “Resident Notes” OR simply scroll down the page to the Resident Note tool.
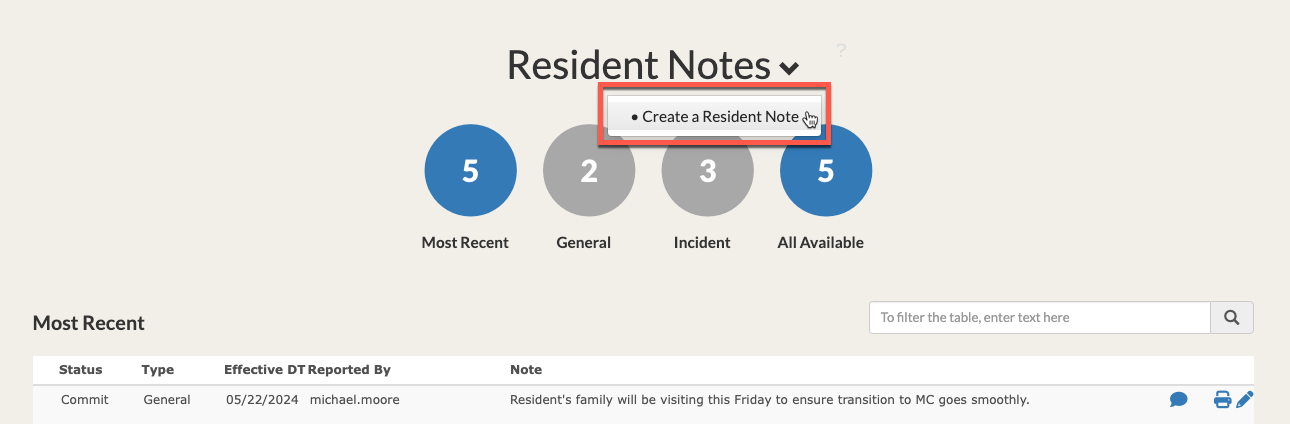
Step 3: From the Resident Note section, select the dropdown arrow next to “Resident Notes” and select “Create a Resident Note” to begin a new documentation.
Step 4: The Resident Note form will display. Fill in all required form fields. Each note requires an Effective Date and an Effective Time along with a selected Note Type. Each organization utilizing Aline Care may have different note types available.
Step 5: Of course, all resident notes will also require the note text. Include all necessary text as pertains to your community or organizational policy.

Step 6 (Optional): Flag the note for a follow up by selecting the Follow Up Check Box and plugging in a follow up due date. This follow up due date will display on the main Aline Care dashboard.
Step 7: Select "Submit" to complete the resident note.

The note is now available on the resident's profile. The note can be printed via the Notes Report, followed up on by selecting the "Speech Bubble" icon, and edited by selecting the "Pencil Icon".
Was this article helpful?
That’s Great!
Thank you for your feedback
Sorry! We couldn't be helpful
Thank you for your feedback
Feedback sent
We appreciate your effort and will try to fix the article