Overview
Specifically, we'll cover navigating to the Manage Rooms tool, adding new rooms to the product inventory, editing room details like style and size, along with editing room pricing.
Steps for Accessing CMT and Viewing Room Inventories

Step 2: After navigating to the Configuration Management Tool, ensure the desired community is selected. The selected community is visible at the top of the page. Select "Community" and then select the desired community if the selection needs to be updated.
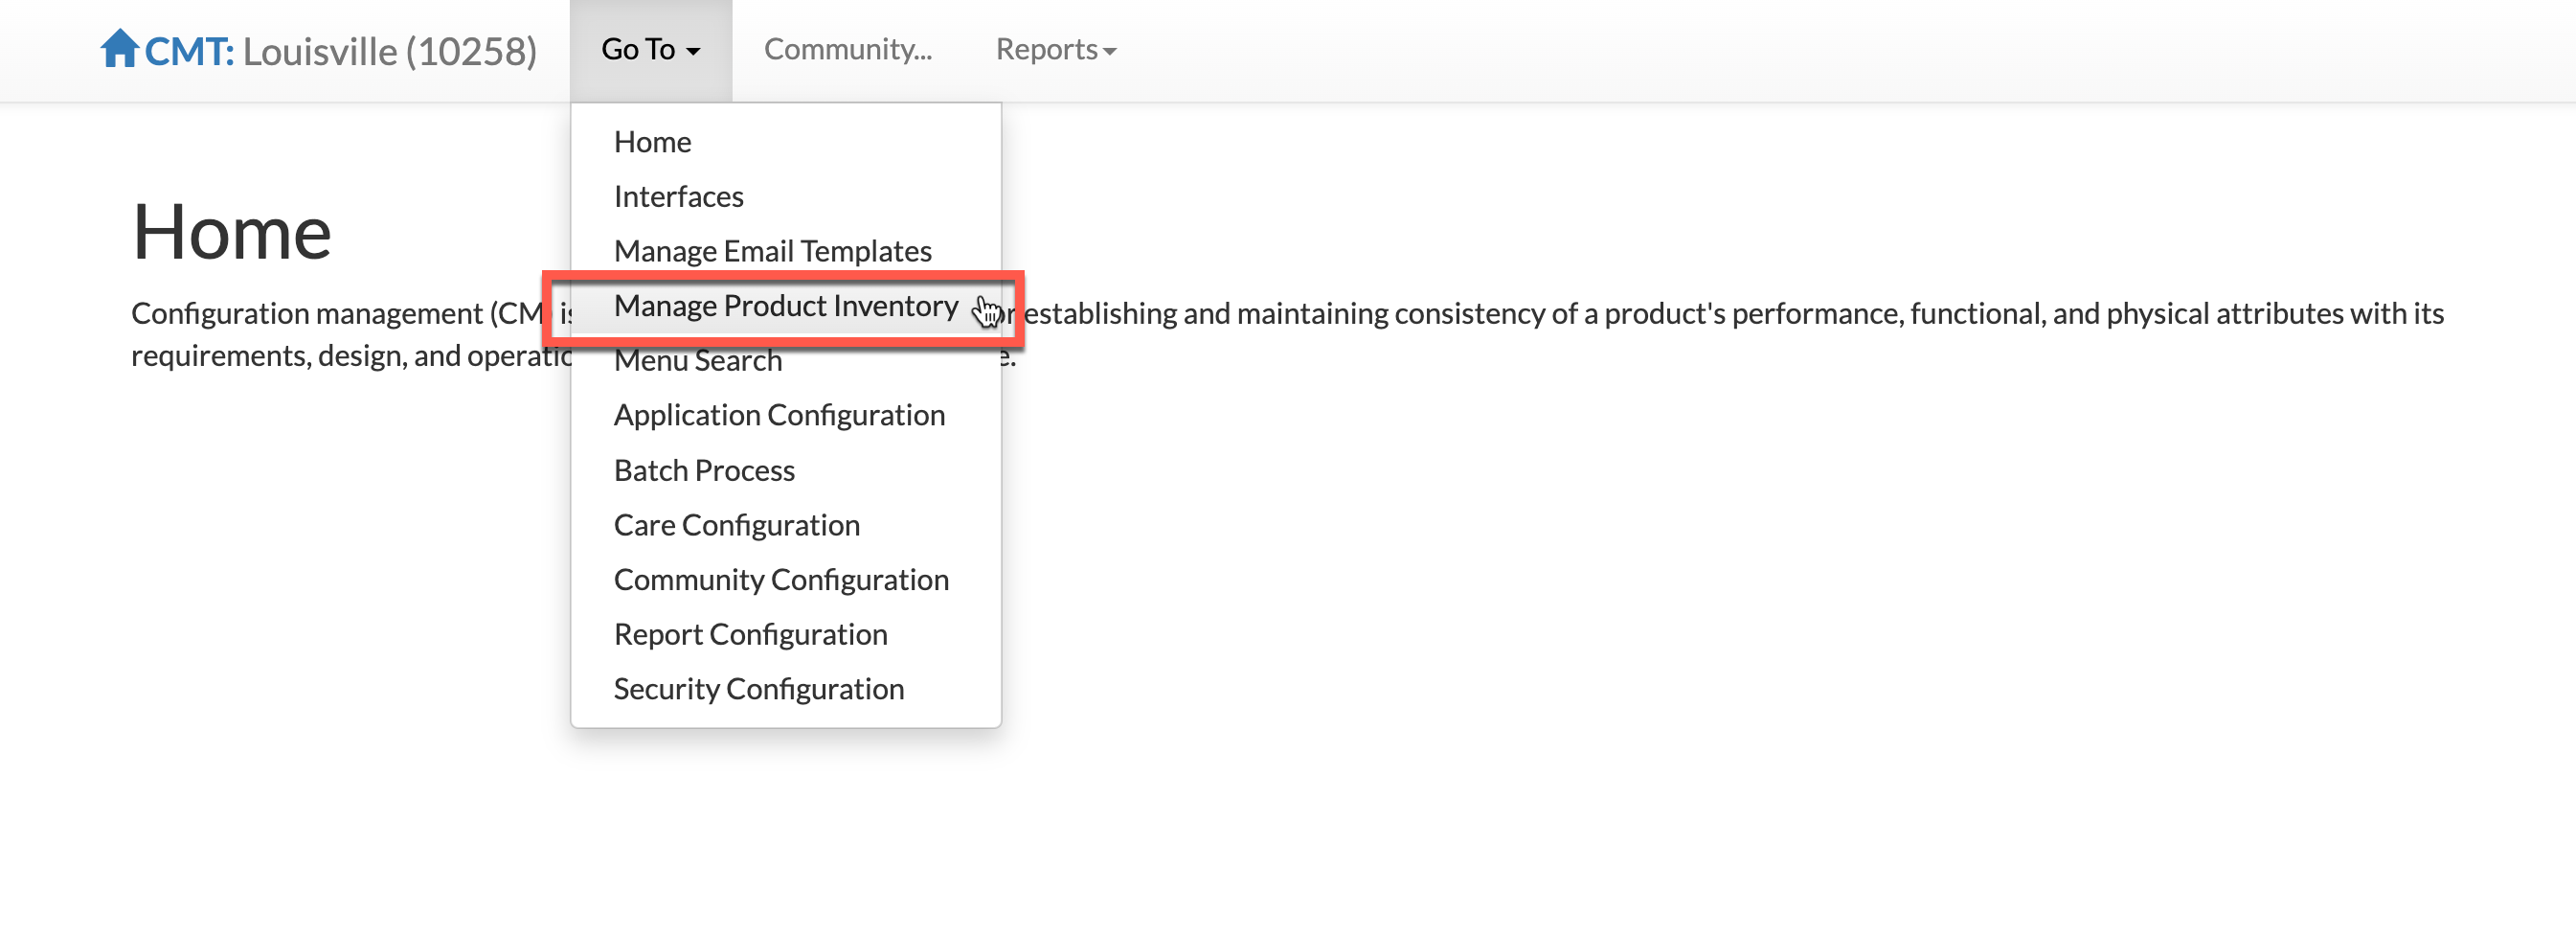
Step 3: Select the "Go To" menu and then select "Manage Product Inventory".
Step 3: Manage Product Inventory will display the pre-configured room types and room styles along with the specific product inventory (room and rates) for the selected community. To view or edit the specific product inventory, select "Manage Rooms".

Step 3: From the Manage Rooms tool, users can add new product inventory, edit details about each specific room, and edit various payor pricing for the room. Rooms can also be searched for by using the included Search Box.

A: Select "Add" to add a brand new room to the community.
B: Select "Edit" to edit various details about the room like the type, style, square footage, etc.
C: Select "Add" to add additional beds to the room or select "Edit" to edit unoccupied beds in the room.
D: Select "Setup" next to the Payor Pricing to set up pricing for a specific payor type.
Steps for Adding a New Room to the Product Inventory
Step 1: From the Manage Rooms tool, select "Add" to add a brand new room to the product inventory.

Step 2: From the Manage Rooms tool, users can add new product inventory, edit details about each specific room, and edit various payor pricing for the room. Rooms can also be searched for by using the included Search Box.

Step 3: Select the level, or floor, the room is on, enter the room's number, select the type of room to be added (studio, one bedroom, etc.), select the service type(s) offered in the room, input the room's square footage, and enter an optional note if desired.
Step 4: Select "Submit" to save the new room into the product inventory. The room is now available for further editing and pricing setup.

Steps for Editing or Deleting a Room in the Product Inventory
Step 1: From the Manage Rooms tool, select "Edit" next to the desired room to edit that room's details.

Step 2: Edit the desired components of the room. Select "Submit" to save the changes. Alternatively, to delete the room from the product inventory, select the "Delete" button.

Steps for Editing, Adding, or Removing Beds in Rooms
Step 1: To edit a room's existing bed, from the Manage Rooms tool, select "Edit" next an unoccupied bed to edit the bed. Occupied beds cannot be edited until the room once again becomes unoccupied.

Step 2: Edit the bed's label or availability date as desired. Select "Submit" to save any changes. Alternatively, beds can be deleted by selecting the "Delete" button.

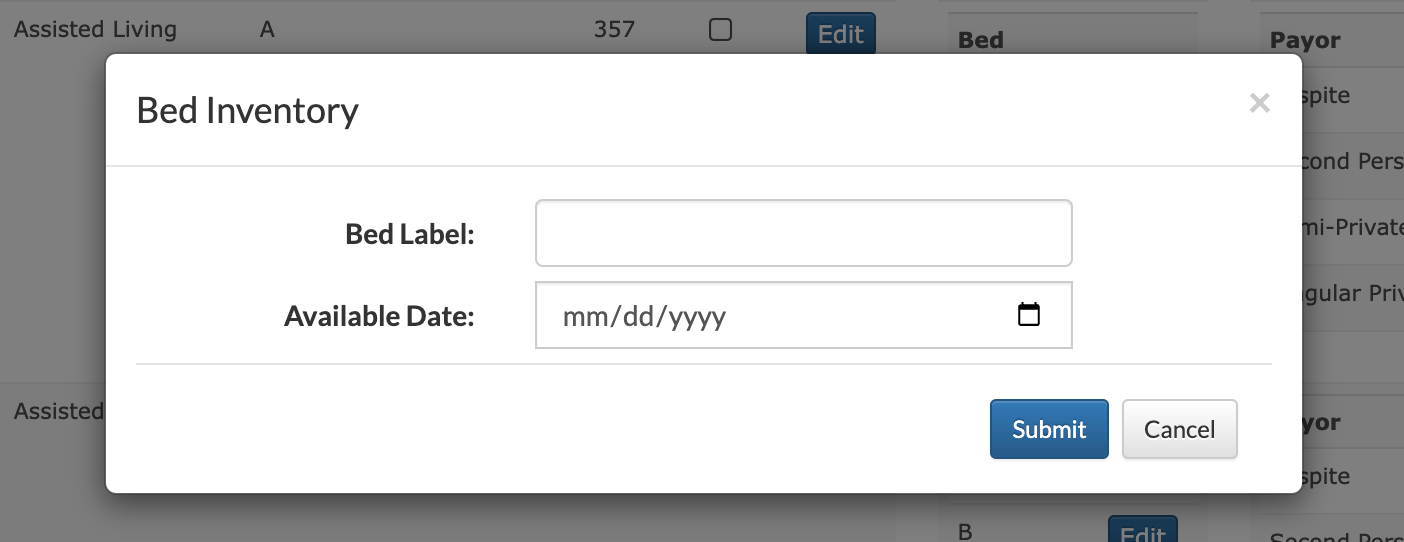
Step 3: To add additional beds to a room, select "Add".

Step 4: Assign the bed a Bed Label, or designation, along with the date the bed will become available. Select "Submit" to save the new bed.
Steps for Adding or Editing a Room's Price
Step 1: From the Manage Rooms tool, room pricing for the four payor types (respite, second person, semi-private, & private) can be created or edited as needed. To edit an existing room's pricing, select the "Edit" button.

Step 2: Enter the edited rate into both the Price - Base field and the Price - Special field before selecting "Submit" to save any changes.
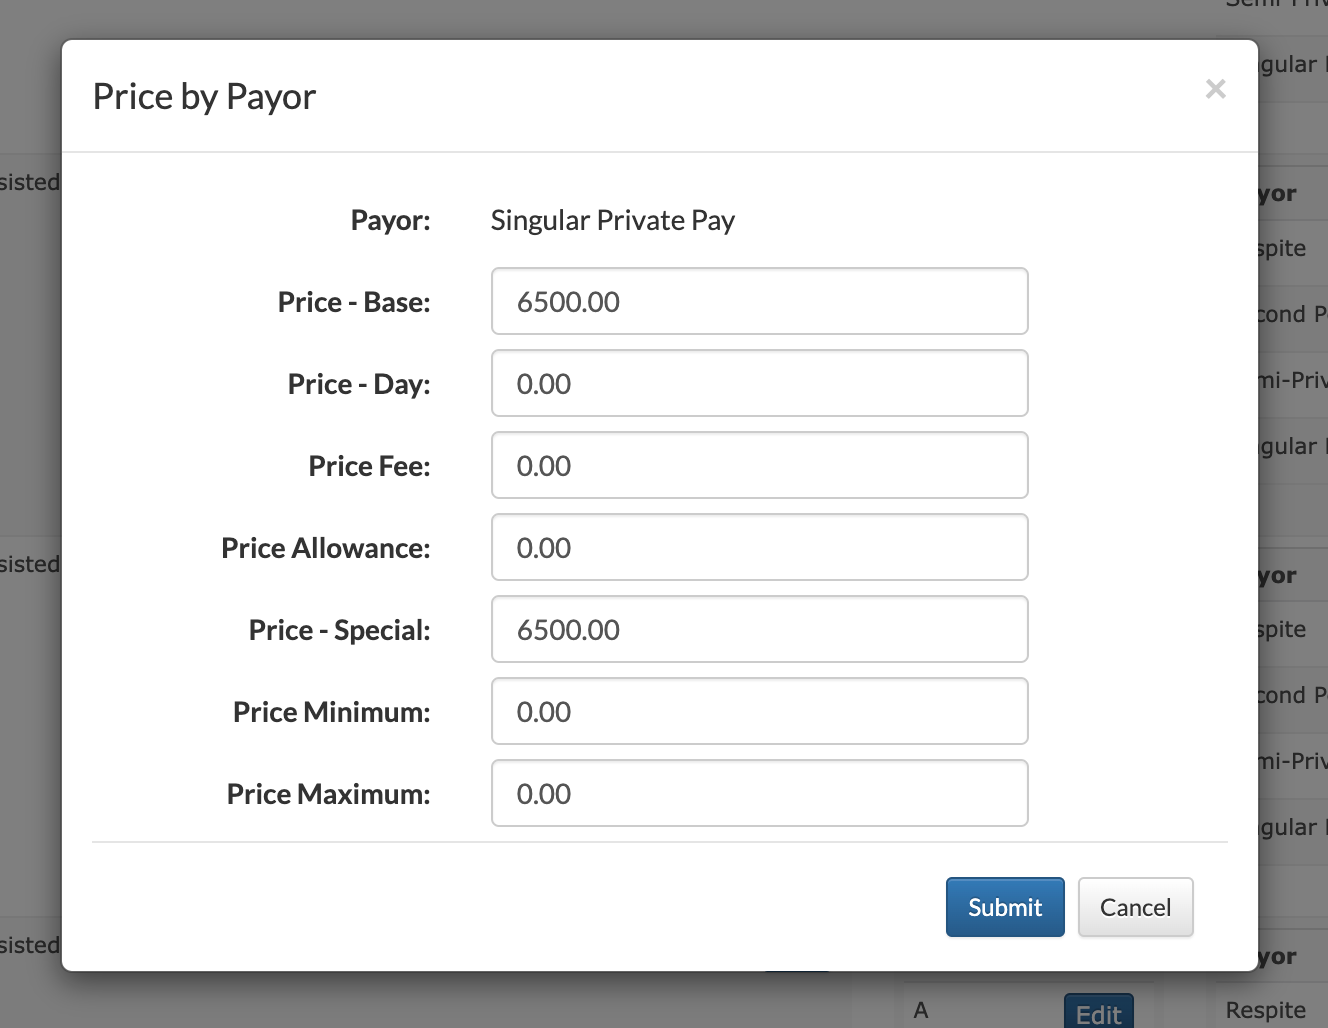
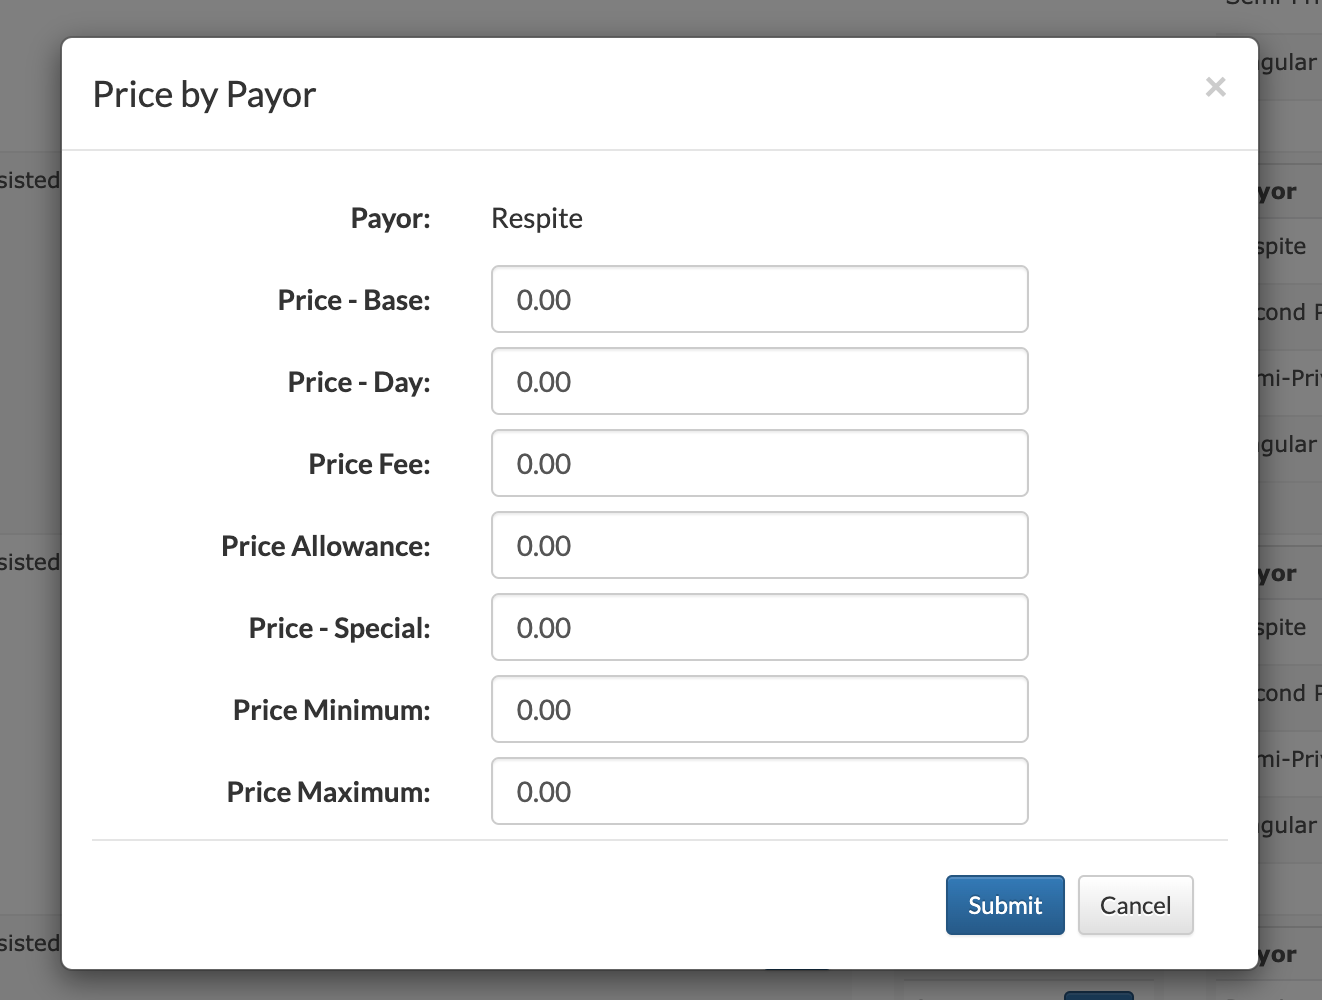
Step 3: Similar to Step 2, to setup new pricing for a desired Payor Type, select "Setup" next to the payor type that needs pricing assigned.
Step 4: Enter the new rates into both the Price - Base field and the Price - Special field before selecting "Submit" to save the new pricing.
Was this article helpful?
That’s Great!
Thank you for your feedback
Sorry! We couldn't be helpful
Thank you for your feedback
Feedback sent
We appreciate your effort and will try to fix the article